Step-by-Step Guide to Fuel Injector Replacement
Fuel injectors are a critical part of your engine’s performance system. They precisely control the amount of fuel that goes into the combustion chamber, ensuring that your machine runs efficiently, cleanly, and powerfully. Over time, injectors can wear out, clog, or malfunction—especially in diesel engines or heavy-duty equipment that operate under demanding conditions.
If you’re facing engine misfires, poor fuel economy, or unsteady acceleration, chances are you may need a Fuel Injector Replacement. Trusted suppliers like Fuel Injector Replacement at AmoParts provide reliable options for replacing injectors in various types of construction, industrial, and commercial equipment.
This comprehensive guide walks you through everything you need to know about safely replacing your fuel injectors, even if you’re not a certified mechanic.
Why Replace a Fuel Injector?
Fuel injectors may fail due to clogging, electrical faults, excessive heat, or contaminated fuel. When they stop working properly, your engine’s performance suffers. Replacing them restores balance to the air-fuel mixture, helps reduce emissions, and prevents long-term engine damage.
Benefits of replacing a faulty fuel injector:
- Improved engine performance
- Better fuel efficiency
- Reduced emissions
- Smoother acceleration
- Prevention of further mechanical issues
Tools and Materials You’ll Need
Before starting, gather all necessary tools and parts. Having everything ready will save you time and avoid mid-repair frustration.
Tools:
- Ratchet and socket set
- Torque wrench
- Screwdrivers (flathead and Phillips)
- Fuel line disconnect tool
- Safety gloves and eye protection
- Cleaning brushes and rags
- Fuel injector puller (for some engines)
Materials:
- New fuel injectors
- Replacement O-rings and seals
- Fuel rail gasket (if needed)
- Anti-seize lubricant
- Clean engine oil
Check your service manual or consult your parts supplier to make sure the replacement injectors match your engine’s specifications.
Step-by-Step Process
Safety First: Disconnect the battery and relieve the fuel system pressure before beginning. Always work in a well-ventilated area.
Step 1: Access the Fuel Injectors
Start by removing any components that block access to the fuel rail. This may include:
- Engine cover
- Air intake tubing
- Throttle body (in some vehicles)
Be sure to label and set aside each part and bolt so you can reassemble everything easily.
Step 2: Relieve Fuel Pressure
To avoid a fuel spray hazard:
- Locate the fuel pump relay or fuse and remove it.
- Start the engine and let it run until it stalls. This relieves pressure in the lines.
- Turn off the ignition and proceed with care.
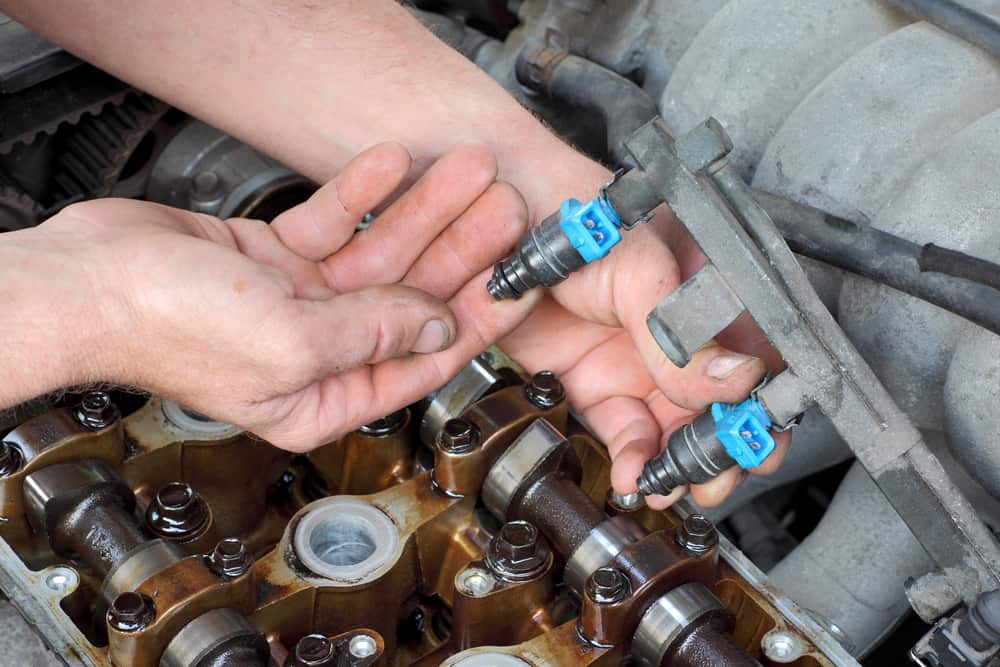
Step 3: Disconnect Electrical Connectors
Unplug each injector’s electrical connector. If the plugs are hard to remove, use a small flathead screwdriver to gently loosen them. Avoid damaging the clips, as they will be reused.
Step 4: Remove the Fuel Rail
Carefully unbolt the fuel rail using your socket set. Once the bolts are out, gently lift the rail from the intake manifold. The injectors will come out with it.
Tip: Slight rocking or twisting may be needed to break the O-rings loose.
Step 5: Remove the Old Injectors
Pull each injector from the fuel rail. Some engines require a special injector puller. Check for:
- Cracks in the body
- Hardened or cracked O-rings
- Fuel deposits or carbon buildup
Dispose of the old injectors according to your local regulations.
Step 6: Prep and Install New Injectors
- Lubricate the new O-rings with a dab of clean engine oil to ensure a proper seal.
- Insert each new injector into the rail, pressing firmly until seated.
- Align the injectors with the intake ports and reinstall the rail carefully.
- Tighten fuel rail bolts to the manufacturer’s recommended torque specs.
Step 7: Reconnect Electrical Connectors
Plug each injector connector back into place. Make sure they click securely. A loose connection could cause misfires or a no-start issue.
Step 8: Reassemble Everything
Reinstall any removed parts in the reverse order:
- Air intake
- Engine cover
- Fuel pump fuse or relay
Double-check that everything is properly connected and tightened.
Step 9: Prime the Fuel System and Start the Engine
Before starting the engine, turn the ignition key to the “ON” position (not “START”) for 3-5 seconds. Repeat this two or three times. This primes the fuel system and pressurizes the rail.
Then start the engine. It may crank a little longer than usual, but it should start and idle smoothly if everything is installed correctly.
Step 10: Check for Leaks and Performance
Inspect the area around the fuel rail and injectors for leaks. Let the engine run for several minutes and listen for unusual sounds or misfires. If everything checks out, take your machine or vehicle for a test drive or short run.
Tips to Extend the Life of Your Fuel Injectors
- Use high-quality fuel. Avoid contaminated or low-grade fuel.
- Change your fuel filter regularly. A clogged filter can send debris to the injectors.
- Add fuel system cleaner. Use injector-safe additives every few thousand miles.
- Avoid long periods of idling. This can lead to carbon buildup.
- Service your engine on schedule. Timely maintenance is key to a long-lasting fuel system.
When to Seek Professional Help
If you’re not comfortable working around pressurized fuel systems or unfamiliar with your engine’s layout, it’s best to hire a professional mechanic. Incorrect installation can result in leaks, electrical issues, or engine damage.
Final Thoughts
Replacing your fuel injectors doesn’t have to be a daunting task. With the right tools, some patience, and careful attention to detail, it’s a manageable DIY project for many operators and technicians.
By following this step-by-step guide and sourcing high-quality components from reputable suppliers like AmoParts, you’ll ensure a successful Fuel Injector Replacement that improves your machine’s performance, extends engine life, and prevents costly future repairs.